
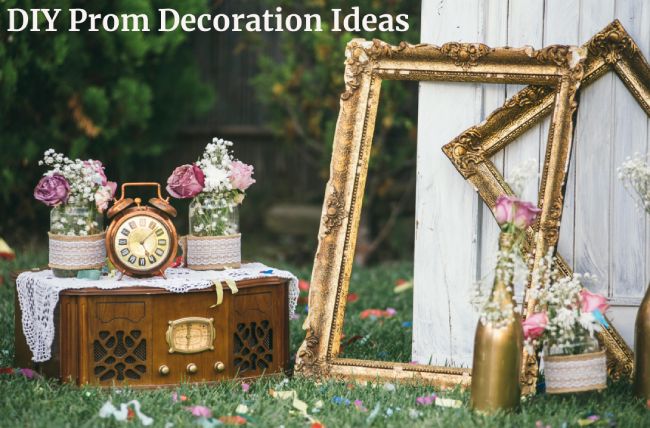
There is no doubt that organizing a big event like the prom can be a lot of work, but being an active participant behind the scenes can also be a lot of fun. Here are a few inspiring ideas that will get you in the mood for the biggest dance of the year with your prom decor ideas.
Choose a Theme for Your Prom Decorations
One of the first things that the committee should do when it comes to choosing the theme of the prom should be to choose one. Choosing a theme can be a great way to help you figure out what kind of decorations you should make or buy for your party.
If you are interested in researching ideas for prom themes, have a brainstorming session with the prom committee and make a conscious decision based on whether the idea can be pulled off and if it is popular amongst the students on the prom committee to decide which is the best option.
Make Plans for a Decorating Scheme
Anderson’s.com recommends ordering prom decorations four to six months in advance. In addition, most fundraisers take place during this time. To order decorating materials, the prom committee might need to plan at least one earlier fund-raising event.
Creative Ideas for Prom Lighting
Make your lighting enchanting by getting creative. Celestial imagery can be used with just about any theme, but it works especially well with Starry Night, Fairy Tales, Garden Enchantment, and A Night in Paris themes.
Ceiling and Accent Lights
An ambiance can be created in an instant with lighting.
- For a unique lighting option, place a mirrored disco ball in the center of draped fabric.
- Lights strung in random zig-zags across the ceiling can be softly diffused behind sheer indigo or navy blue gossamer panels.
- Highlight decorative backdrop materials, such as shimmering curtains, with LED spotlights in purple or blue.
- Hang strings of lights from ceiling to floor and use tulle as a backdrop.
- A punch table can look gorgeous with lights under a tablecloth.
- Create luminaries for walkways and entrances by using flameless tea lights and white paper bags.
DIY Luminary Prom Centerpieces
It’s easy and cheap to make these cute luminary centerpieces. Extra small votive candles can be placed on the table if you need more light for dining. To coordinate with your theme, use different colors of glitter.
Materials list:
- Lids for jars
- Spray for hair
- The color blue glitters
- Lights from fairy moons
Instructions:
- Make sure the jar is evenly coated with hairspray. Cover the entire surface to prevent bare spots.
- Put some glitter in the container and screw the lid on. Make sure the glitter is completely covered in the jar by shaking it vigorously.
- Insert the fairy moonlights again into the jar. Make sure you can still click on and off the battery pack by taping it to the lid of the jar.
Use a hot glue gun to embellish the lids with glitter numbers and small flowers or feathers to indicate the last two digits of the year.
Posh Prom Decorations
Glitz and glamor decorations can be tailored to fit a variety of themes. A nostalgic feel is created using vintage accents such as silhouettes of flappers dancing, jazz musicians, and Art Deco style designs. Most of the same decorations can be used in a more modern Hollywood, Celebrity Couples, Diamonds Are Forever, or Red Carpet theme with just a few tweaks.
Background and Ceiling Decor
Turn your event space into a 1920s Hollywood mansion with props and posh background materials.
- Curtains made from shiny strips of gold metallic foil create a glitzy backdrop behind a marquee-inspired photo arch.
- Do a remake of the Hollywood sign using cardboard letters against a paper background of rolling hills.
- Hang pearl ivory balloons upside down from the ceiling, using different lengths of clear monofilament line. The balloons resemble the floating bubbles in a champagne glass, suspended at dozens of different heights.
- Near the overhead lights or suspended just under them, hang three-tiered gold chandeliers made from shimmering strands of Mylar.
Opulent Entryway and Table Decor
Sometimes the entryway doubles as the photo area. Make it impressive and picture worthy.
- For centerpieces, fill large plastic martini glasses with strands of fake pearls, allowing one or two ends to dangle over the edge.
- Use cardboard pieces to frame the doorway of the main entrance. Paint the cardboard black and then use metallic gold paint to embellish the cardboard with Gatsby-inspired geometric designs. Make a marquee style sign to mount over the doorway and position two spotlights to shine up at the sign. Keep the doors propped open and hang red velvet curtains inside the doorway.
- Place small, white votive candles along gold satin table runners and sprinkle diamond cut acrylic vase filler along the runner to simulate the look of scattered jewels.
Inexpensive DIY Prom Decorations
These generalized decorations can be made to work with practically any prom theme:
Tissue Paper Pom-Poms
Tissue paper pom-poms are inexpensive to buy ready-made, however, they are also easy to make. You might be able to save a little money buying bulk packages of tissue paper and gathering up volunteers to help make them.
Materials list:
- Bulk packages of tissue paper
- Scissors
- Floral wire or jewelry wire
- Ribbon
Instructions:
- Layer six to ten full-size sheets of tissue paper together on a flat surface. Alternate between two or three colors for a striped effect or use varying shades of the same color for a floral effect. Using small, one-inch folds, fold the paper accordion-style going across the width of the sheets.
- Use the scissors to trim the folded ends of the paper. Trim at each corner for pointed ends or cut in a curved, semicircle for rounded ends.
- Bind the folded sheets of tissue paper together in the center with a piece of wire, twisting the ends together to secure it. Tie a piece of thin ribbon to the wire so the pom-pom can be suspended when it’s finished. Cut the ribbon pieces in varying lengths so the pom-poms will hang at different heights.
- Carefully pull apart each layer of tissue paper, fluffing as you go to form a sphere. See how this is done by watching this video tutorial. Once the ball is formed, it is ready to hang.
Tip: Cut the sheets of tissue paper into smaller squares to form smaller pom-poms or to create tissue paper flowers for centerpieces.
Balloon Arches
Balloon arches are not difficult to make and can be used to decorate the entryway, a buffet table or to provide a decorative frame for prom photos.
An arch made with helium filled balloons can be supported with something as simple as a plastic decorating strip anchored by buckets or sand bags, as the helium will hold the balloons in place. However, in addition to the higher cost of the helium, this type of arch only lasts six to twelve hours.
With a lightweight frame made from PVC, an arch made with air-filled balloons can be put together days before prom night. The following instructions will make a two color balloon arch.
Materials list:
- Two PVC pipes, one-half inch diameter, cut in equal lengths
- One PVC connector
- Two wood blocks, two-inches thick
- Drill with two-inch bit
- PVC glue
- Balloons
Instructions:
- Join the two PVC pipes, using the connector. Put a bead of glue around the inside edge of the connector before inserting the pipes to ensure they stay connected.
- Drill a half-inch hole in the center of each wooden block. Add a bead of glue around the inside edge of each hole and insert each end of the PVC pipe into a block
- Bend the PVC pipes into an arch shape. Anchor each wooden block with a sandbag.
- Blow up two balloons of the same color and tie the necks together, sealing the balloons while simultaneously joining them together. This is called a “duplet.” Repeat with two balloons of the other color.
- Take the two sets of “duplets” and cross them together in the middle, twisting two balloons from each set around each other to join them, creating a “cluster.”
- Attach the cluster to the PVC pole by separating two of the balloons and pushing the center of the cluster against the pole. Twist the two separated balloons around the pole to secure the cluster.
- Repeat to attach a second cluster, rotating it 45 degrees so it is nestled into the first cluster. Push the center firmly against the center of the first cluster, twisting two balloons around the pole to secure it. Continue to add clusters until the arch is covered.
Tips:
- To ensure all the balloons are inflated to the same size, use the first balloon to create a cut-out cardboard template. Inflate the balloons just under their full capacity to avoid having them pop. Use an air compressor to speed up the task.
- To make sure you get the right height and width for your entryway or photo arch, use one of the fol lowing two formulas :
- Arch with the same width and height – 1. 5 x height + width = total length
- Arch that is taller than it is wide – 2 x height + width = total length
Decorating Ideas for Arabian Nights Prom Theme
Filled with romance and exotic imagery, an Arabian Nights prom theme is likely to be hit at any high school. Pull of the look, even on a tight budget, with some creative ideas.
Entryway and Photo Arch
Draped doorways and arches featuring the shape of domed Islamic temples incite a Middle Eastern vibe for an Arabian inspired event.
- An arch in the shape of an onion dome fits the theme perfectly but might be pretty tricky to try to build. Alternatively, make a red and purple balloon arch accented with gold cardboard cutouts of crescent moons and genie lamps.
- Drape the entrance to the prom in lush, satiny layers of gold and purple. Add a couple of large potted palm plants to give the night an authentic feel. If you cannot find any to borrow, considering making some.
Lighting
An Arabian color scheme includes fiery oranges and reds mixed with vibrant jewel tones of turquoise, purple, blue and green and accents in yellow and gold.
- Drape sheer panels of gossamer and satin across the ceiling and down over walls, giving the room a tent like feel.
- Hang purple spiral beaded chandeliers to catch overhead light and add sparkle.
- Hang strands of string lights behind the gossamer fabric for romantic accent lighting.
- Cover a wall in bright red or turquoise paper and use metallic gold paint and a stencil to apply a Moroccan trellis design.
DIY Palm Trees
These Palm trees can also be used with other themes such as a beach, Hawaiian or tropical theme.
Materials list:
- Empty carpet roll – visit a carpet store to ask for these large cardboard tubes
- Large brown paper sacks or brown Kraft paper
- Scissors
- Clear packing tape
- Microphone stands – borrowed from the band or choir room
- Broken or donated umbrellas
- Fake palm branches (optional if you can find them)
- Green drinking straws
- Green butcher paper
Instructions:
- Place the empty carpet roll on a microphone stand, which serves as the base.
- Cut the bottoms out of the brown paper bags and slide them over the carpet roll. Scrunch them up to resemble the rough trunk of a palm tree. Do the same with the Kraft paper if that’s what you’re using. Wrap it around the carpet roll and scrunch it. Use small pieces of tape to hold it in place.
- Remove all the fabric from the umbrellas until they are just wire skeletons. Place them in the top of the carpet roll to serve as branches.
- Use wire cutters to separate the fake palm branches into individual pieces. Tape three or four branches to each umbrella arm.
- Cut the green butcher paper into long, palm leaf shapes. Tape the paper leaves to the umbrella arms, allowing the metal arm to serve as the main vein running through the middle of the leaf. Tape the green straws at a 45-degree angle from the umbrella arm to serve as small veins and added support to the leaf.
Tip: Instead of clear packing tape, use brown duct tape on the trunk and green duct tape on the leaves.
Table Decor and Lighting
Jewel tone colors on tables fit perfectly with this exotic prom theme.
- Cover tables with vibrant purple tablecloths. Use a bright red or fuchsia table runner.
- Imply opulence with metallic gold tableware. Add some green accents with turquoise napkins or place mats.
DIY Moroccan Lantern Centerpieces
These homemade centerpieces dress up tables like little jewels. These will need to be made at home a few weeks in advance of the dance.
Materials list:
- Empty clean jars
- Disposable clear plastic cups for mixing colors
- Modge Podge
- Measuring spoons
- Water
- Food coloring in assorted colors
- Cookie sheet
- Aluminum foil
- Oven mitts
- Gloss enamel paint – opaque writer 3-D glorious gold
- Small acrylic jewels
- Super glue
Instructions:
- Preheat the oven to 200 degrees. Pour a tablespoon of Modge Podge and half a tablespoon of water into a cup.
- Add five to seven drops of food coloring into the mixture in the cup. Stir well to blend.
- Pour the colored mixture into a jar. Tip the jar and swirl the color around on the inside, covering as much of the surface as possible. Place the jar upside down on a foil covered cookie sheet and let it sit for an hour so the excess color runs out and covers any bare spots. Repeat for the remaining jars.
- Turn the jars over and wipe off any excess color around the rim. Replace the foil on the cookie sheet with a clean piece and place the jars on it upright. Put the jars in the oven for 45 minutes.
- Carefully remove the cookie sheet of jars and allow the glass to cool completely. Use the gold enamel paint to embellish the outer surface of the jars with small dots, cascading swags and any other Moroccan inspired designs you have in mind.
- Allow the paint to dry completely and then apply small acrylic jewels with super glue if desired.
Tips: Mix the food colors to get secondary colors like turquoise or magenta. For turquoise, add a couple of drops of green to four or five drops of blue. For magenta, add one drop of blue to five drops of red.
Look for Moroccan lantern patterns online and work them out on paper first. Use LED tea lights for illumination to avoid scorching the pretty finish inside.
Checklist for Prom Supplies
Once your theme is established and the decorating committee has brainstormed ideas for props and decorations, make sure the basics are covered with a list for:
- Background decor – rolls of paper, decorative fabrics and curtains
- Ceiling decor – balloons, streamers, faux chandeliers, fabric, string lights
- Table decor – tablecloths, runners, tableware and centerpieces
- Entryway and photo arch – cardboard, fabric, paint, props, balloon arch supplies
- Accent lights – spot lights, string lights, candles, LED lights
Divide your supply list into items you can ask around to borrow or that can be donated to the event and see what the school might already have on hand. The rest will have to be purchased from local stores or online.
Donated or Borrowed Supplies
A few examples of things you can put the word out for include:
- Tools (paintbrushes, hammers, screwdrivers, etc.)
- Christmas string lights
- Tape and glue (specify what kind)
- Empty glass jars (if needed)
- Cardboard
- PVC pipe
- Wood boards
- Fishing line (clear monofilament)
Ordered or Purchased Supplies
Things you might need to order or buy include:
- Balloons
- Fabrics, curtains
- Specialty props
- Large rolls of paper or murals for backgrounds
- Disposable tableware
- Tablecloths and table runners
- Specialty paints and other craft supplies
- LED candles, fairy lights, spotlights
Be sure to label borrowed items in an inconspicuous area with a small piece of masking tape and a name if they are to be returned. You should also have a written list of what was borrowed.
Enjoy the Memories of Your Prom
If you’re a member of the prom decorating committee or even a volunteer, get some good photos of all the decorations as they come together for your special event. You’ll enjoy looking back on them someday and sharing bragging rights with your kids.